
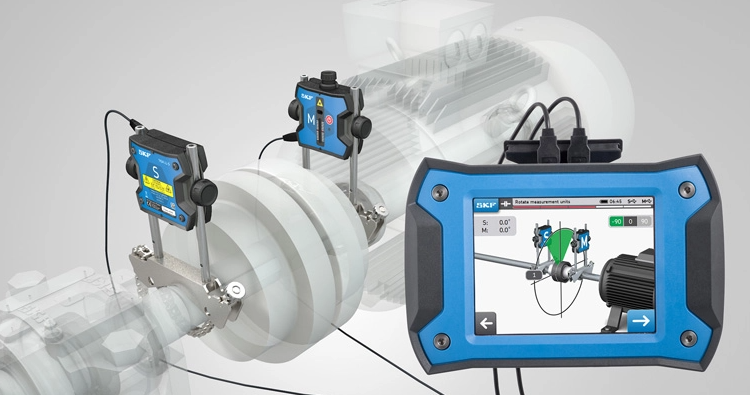
Laser shaft alignment is a tool used to measure and set the blade of a milling machine or lathe. It uses a laser to determine how far off-center the workpiece is and adjust it accordingly. This article will give you some essential tips on how to use this tool so that you can get the most out of it.
Here are eight tips on how to use one:
1. Always take your time:
The first tip is to always take your time. Laser shaft alignment is a process, and you can’t rush it. If you rush the process, you will make mistakes that could cost you thousands of dollars in damages or even worse, an injury! Taking your time will help ensure that everything goes smoothly and that all of your measurements are accurate.
2. Make sure that the tool is set up properly:
The second tip is to make sure that your tool is set up properly. The proper setup ensures that you are getting accurate readings and that the alignment process will go smoothly. You should always make sure that your device is calibrated, as well as any other tools or equipment used during the process.
3. Set your workpiece on the machine and make sure it is secured firmly in place:
The third tip for laser shaft alignment is to set your workpiece on the machine and make sure it is secured firmly in place. The proper setup ensures that you are getting accurate readings and that the alignment process will go smoothly. You should always make sure that your device is calibrated, as well as any other tools or equipment used during the process.
4. Check for accuracy:
The fourth tip is to check for accuracy before proceeding with any adjustments. It can be done by measuring the distance between two points on the workpiece and comparing it to the reading on your instrument. If there is a significant difference between these two measurements, then it’s likely that you need to make adjustments.
5. Start the machine:
The fifth tip is to start the machine and make sure that it runs properly before proceeding with any adjustments. It will help you avoid any damage to your equipment as well as ensure that everything is set up correctly. You should also check for any loose or broken parts and make sure that nothing has shifted out of place during transport.
6. Make sure that there is no slippage between your workpiece and the tool itself as this will affect results:
The sixth tip is to make sure that there is no slippage between your workpiece and the tool itself as it will affect results. You will need to check that there are no gaps between the wood and the spindle, as well as ensure that everything is properly tightened down with a wrench.
7. Stop the machine and mark where you are off-center with a pencil:
The seventh tip is to once you have found a good reading, stop the machine and mark where you are off-center with a pencil or pen so that corrections can be made later or by someone else if necessary. It will help to ensure that the spindle is in the right place and that your job will be as close to perfect as possible.
8. Tighten down the spindle with a wrench:
The eighth tip is after you have marked where you are off-center, tighten down the spindle with a wrench until it is snug. If you have a dial indicator, you can check the off-center reading again and make sure that it has not changed.
Conclusion
Hence, now you will be able to get your laser shaft alignment tool set up and working in no time. Making sure that all of your equipment is properly calibrated will help ensure that everything runs smoothly and efficiently when it comes time for production. Also make sure that you have all of the other necessary accessories and supplies, such as mounting brackets and holders. You should also make sure that all of your equipment is properly calibrated and in good working order. You will save yourself a lot of time, effort and money if you take the time to make sure that everything is ready before you start production. If you are having trouble with anything, feel free to contact a professional for help.


