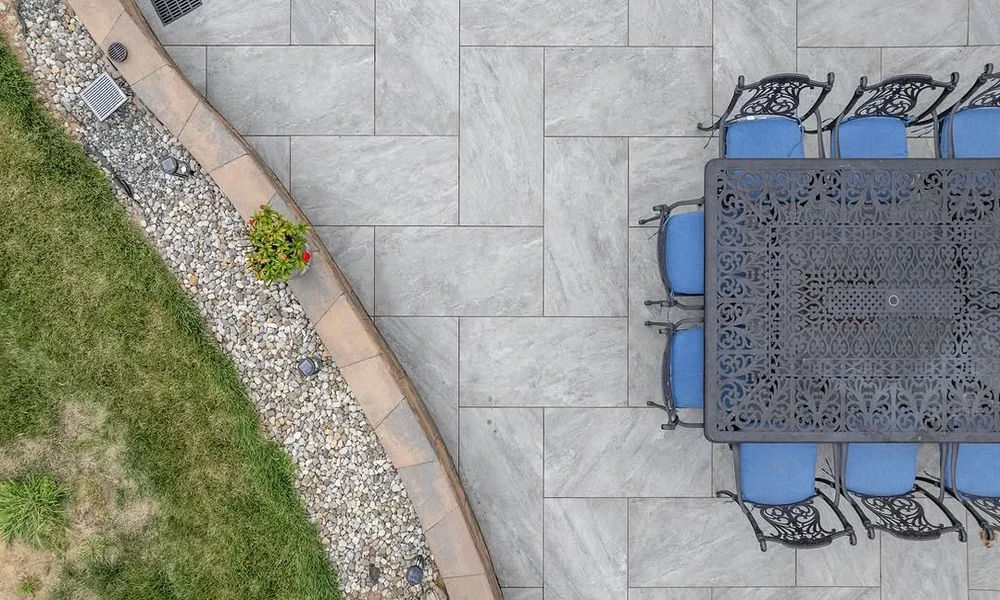
Here’s a confession: a good-looking patio can hide a terrible foundation for two full seasons before it starts to buckle. By then, you’ve already had the cookouts, taken the photos, and convinced yourself the project was a success. Then spring arrives, and the freeze-thaw cycle has shifted three pavers, opened a gap you could lose a garden hose in, and sent water pooling toward your foundation.
Most paver failures aren’t caused by cheap materials or lazy contractors. They’re caused by one decision made before any stone ever touches the ground: getting the base layers wrong. And the most misunderstood layer of all is sand.
This guide walks you through the layer logic that separates a patio that holds up for 15 years from one that needs a redo in 18 months.
Why Outdoor Projects Are Booming Right Now
Outdoor upgrades aren’t a pandemic quirk anymore. More than half of renovating homeowners (53%) enhanced their outdoor spaces in 2024, completing nearly two outdoor projects on average, according to the 2025 U.S. Houzz and Home Renovation Trends Study. Patios, walkways, and retaining walls are the most popular choices, and for good reason: hardscape projects add visual structure to a yard without the ongoing maintenance demands of sod or garden beds.
The catch? Hardscape is only as good as what’s underneath it. And most DIYers spend their entire budget on the pretty stuff at the surface while cutting corners on the unglamorous layers below.
The “Layer Logic” Framework Every Homeowner Needs
Think of a paver installation as a sandwich, not a single slab. Each layer has one job, and none of them can double up. The moment you try to ask one layer to do two jobs, the whole system starts to drift.
Here’s how the layers stack from bottom to top:
- Subgrade – the native soil, compacted firmly. This is your starting point, not your foundation.
- Sub-base – 4 to 8 inches of compacted crushed gravel, which handles load distribution and frost heave resistance.
- Bedding sand – roughly 1 inch of coarse concrete sand that sits between the compacted gravel and the pavers themselves.
- Pavers – laid and set into the bedding sand, then tamped down to seat evenly.
- Joint sand – swept into the gaps after placement to lock pavers against lateral movement.
Each layer is doing a different physical job. The gravel handles compression. The sand handles fine leveling and flexibility. Mix them up, and you get a patio that looks perfect on day one and cracks by year two.
The Specific Mistake Most People Make With Sand
Picture this: a homeowner in Bucks County picks up a few dozen pavers, digs out 3 inches of soil, dumps a thick layer of sand, lays the stones, and calls it done. The surface looks gorgeous for about eight months. Then a hard winter hits. The sand, which was never properly confined or compacted over a gravel base, shifts under frost pressure. Two pavers sink by half an inch. A third tilts and becomes a trip hazard. The whole project has to come out.
This is one of the most common paver failures. Many paver failures start with the same mistake: using too much sand and not enough compacted base. Sand is not a substitute for a gravel sub-base. It was never designed to be. Sand’s job is to create a smooth, slightly flexible seating surface after the gravel has already done the structural work.
Thickness matters too. Bedding sand is a thin layer of coarse concrete sand that helps pavers sit evenly before final compaction. Industry guides typically call for about 1 inch of uncompacted bedding sand. More than that and you’ve introduced instability, not cushion.
Bar Sand vs. Concrete Sand: Which One Goes Where
Not all sand is the same, and using the wrong type in the wrong place is the second most common DIY mistake after skipping the gravel base entirely. The two types you’ll encounter most often at a local supply yard are concrete sand (also called masonry sand) and bar sand. Each one has a specific role, and they’re not interchangeable.
| Sand Type | Texture | Primary Use | Best For |
|---|---|---|---|
| Concrete / Masonry Sand | Coarse, angular | Paver bedding layer | Patios, walkways, driveways |
| Yellow Bar Sand | Finer, smoother | Soil amendment, masonry, sandbox fill | Gardens, rain gardens, stucco work |
Concrete sand is coarser and angular, which means it compacts well and locks pavers into place from below. Bar sand is finer, which makes it better suited to soil amendment work, sandbox fill, or applications where you need something that settles smoothly into a surface. Put bar sand under your pavers as a bedding layer and it’ll behave like a liquid under load, shifting wherever pressure takes it.
Speaking of soil amendment: sand’s role in garden beds comes with a well-documented caveat. One garden misconception repeated routinely is to till sand into clay soil to break up the clay structure and facilitate better drainage. The idea stems from the fact that if clay is the smallest soil particle leading to poor drainage, and sand is the largest soil particle causing fast drainage, mixing the two will equal out to well-drained soil. Unfortunately, it doesn’t work that way. When sand mixes with clay, it creates a soil structure akin to concrete. University of Illinois Extension has documented this clearly. The takeaway: if your goal is drainage in a planting bed, pair coarse sand with generous organic matter rather than using it alone. Sand works best in hardscape applications where it’s confined by compacted layers above and below it.
A Step-by-Step Checklist Before You Order Materials
Before you place a material order or rent a plate compactor, run through this checklist. Skip any step and you’re building on assumptions.
- Measure twice. Calculate your square footage, then figure out cubic yards of gravel and sand needed. For a patio with a 6-inch gravel base and 1-inch sand layer, you’re moving more material than most homeowners expect.
- Mark utilities. Call 811 at least three business days before you dig. Always, no exceptions.
- Excavate to depth. For a residential foot-traffic patio, plan to dig down at least 8 to 10 inches to account for the full layer stack.
- Compact the subgrade. Before any gravel goes in, compact the native soil with a plate compactor. Loose soil under gravel will still settle.
- Lay and compact gravel in lifts. Add gravel in 2 to 3-inch layers, compacting each before adding the next. One thick dump and one pass with a compactor doesn’t cut it.
- Screed your sand layer. Use 1-inch screed pipes as guides. Pull a straight 2×4 across them to create a perfectly flat, consistent surface.
- Set edge restraints before pavers. Plastic or aluminum edging goes in after the sand layer, before any stones. It keeps the perimeter from migrating outward under load.
- Order bulk, not bags. For anything over roughly 50 square feet, buying sand and gravel in bags is expensive and inconsistent. A local supplier offering bulk sand delivery in Souderton will save you money per cubic yard and give you material with consistent gradation, which matters when screeding for a level bed.
The Question People Forget to Ask Their Supplier
When you call to order sand, ask your supplier one question almost nobody thinks to ask: what’s the gradation? A coarse, angular concrete sand with consistent particle size will screed flat and compact evenly. Sand with a wide mix of particle sizes, or with fine material mixed in, can behave unpredictably under the weight of pavers and foot traffic over time.
A good local supplier will know exactly what they’re selling. If they can’t tell you the gradation or intended application for their sand, find one who can. The material you’re building on deserves the same attention you’re giving the stones on top of it.
“The addition of soil amendments is informed by site conditions, landscape goals, and soil test results, not prescribed universally.” Colorado State University Extension notes in its guide to choosing soil amendments that matching material to site conditions is what drives results. The same principle applies to hardscape: the right sand in the right layer, for your specific soil and climate, is what builds a project that actually lasts.
One Final Thing Before You Start
Outdoor projects have a way of ballooning in scope once the first shovel goes in. You find a drainage problem you didn’t know was there, or the subgrade turns out to be softer than expected. Build in a 15% material buffer on both your gravel and sand orders. Running out mid-project and waiting on a delivery means your screeded sand surface sits exposed to rain and foot traffic, and you’ll spend an extra hour re-leveling what you already did.
The difference between a patio that embarrasses you in three years and one that looks better in ten is mostly invisible. It’s buried under your stones, doing its job quietly. Get those layers right and the surface will take care of itself.